|
PalMod: Importing Sprites from Fighter Factory
Howdy! I hope you're finding PalMod useful. This is a quick guide to generating RAW texture files that can be used by PalMod for sprite display. PalMod has many sprites built in already, but importing SFF files is an easy way to expand PalMod's coverage.
Tools You Need For This
- Fighter Factory Studio
- A MUGEN tool for sprite editing.
- Adobe Photoshop
- Crazy good image editing studio, with a free 7 day trial available.
- PalMod
- PalMod itself: a tool used to modify palettes in game ROMs or files.
- PalMod Photoshop ACTs
- A set of ACTs for use with PhotoShop that provide maximum possible color delineation, avoiding problems with repeated colors within the palette.
×
![]()
How To
- Find the SFF (sprite sheet file for Fighter Factory) that you want to use. Many communities will already have collections available.
- Open Fighter Factory Studio.
- Go to the Project menu and select "Open single file...".
- Open up the SFF file you want to use.
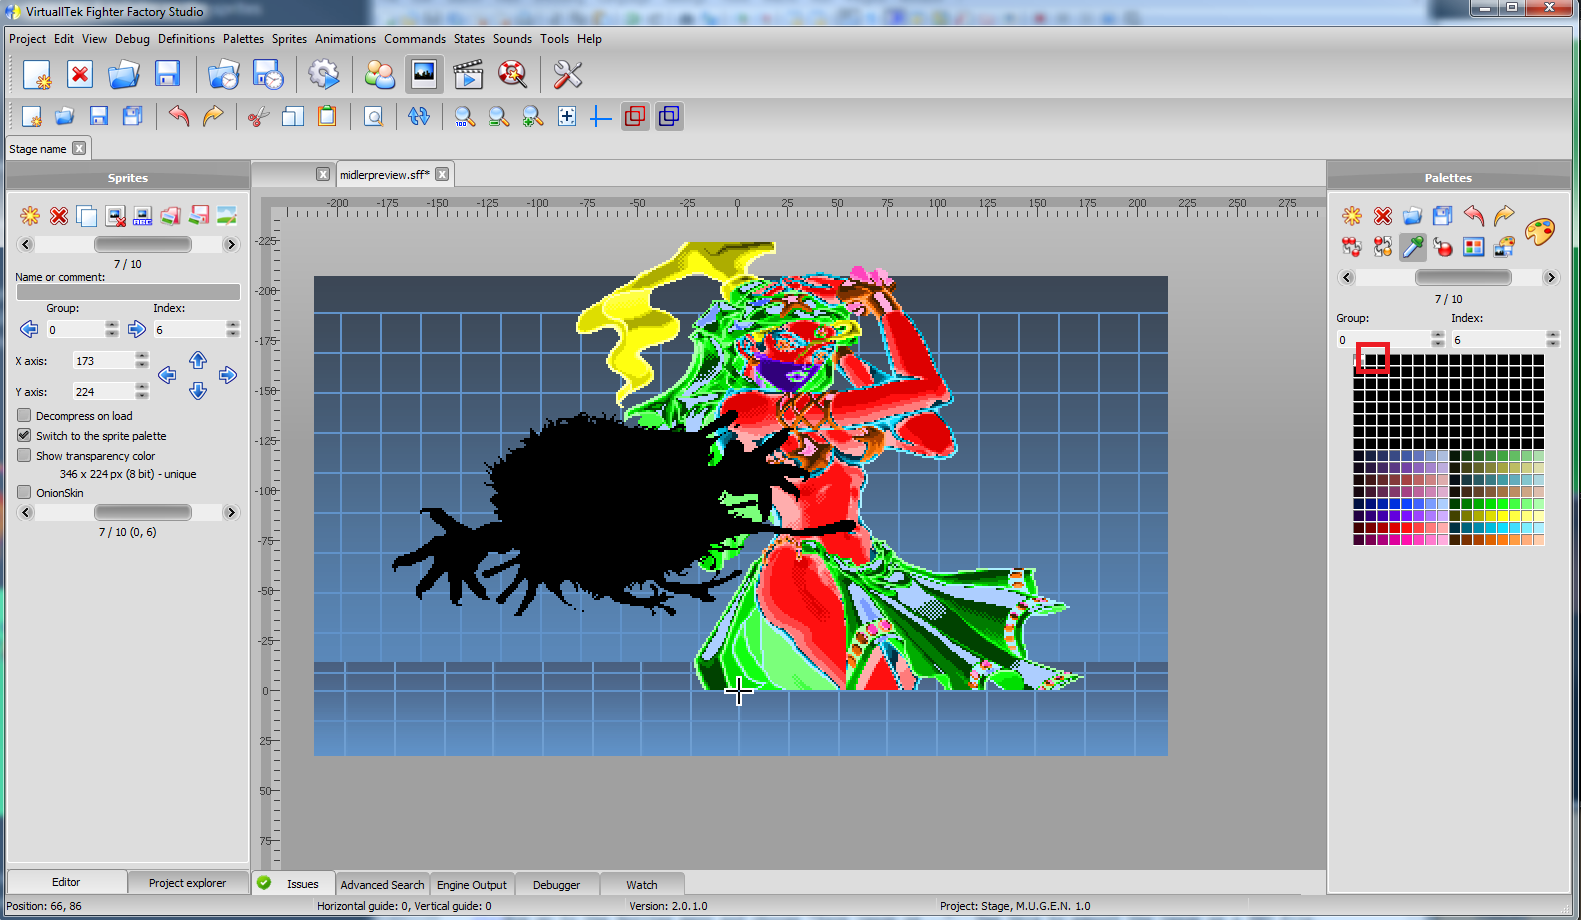
- The color table / palette for that SFF should now be visible on the right: that should match the palette shown for that sprite in PalMod.
- Update the palette used by going to the Palettes menu and choosing "Change...". Then load one of the ACTs from the PhotoshopACTs.rar .
- For the paired "Select/Winning 1" and "Select/Winning 2" sprites, each is stored with the other half blacked out. Since PalMod can join those together on display, you can edit the unused/blacked-out character out.
- Double-click the 2nd square in the Palettes view on the right: that should be the first black square/color.
- Change "Alpha channel" in the Color dialog that pops up to be 0.
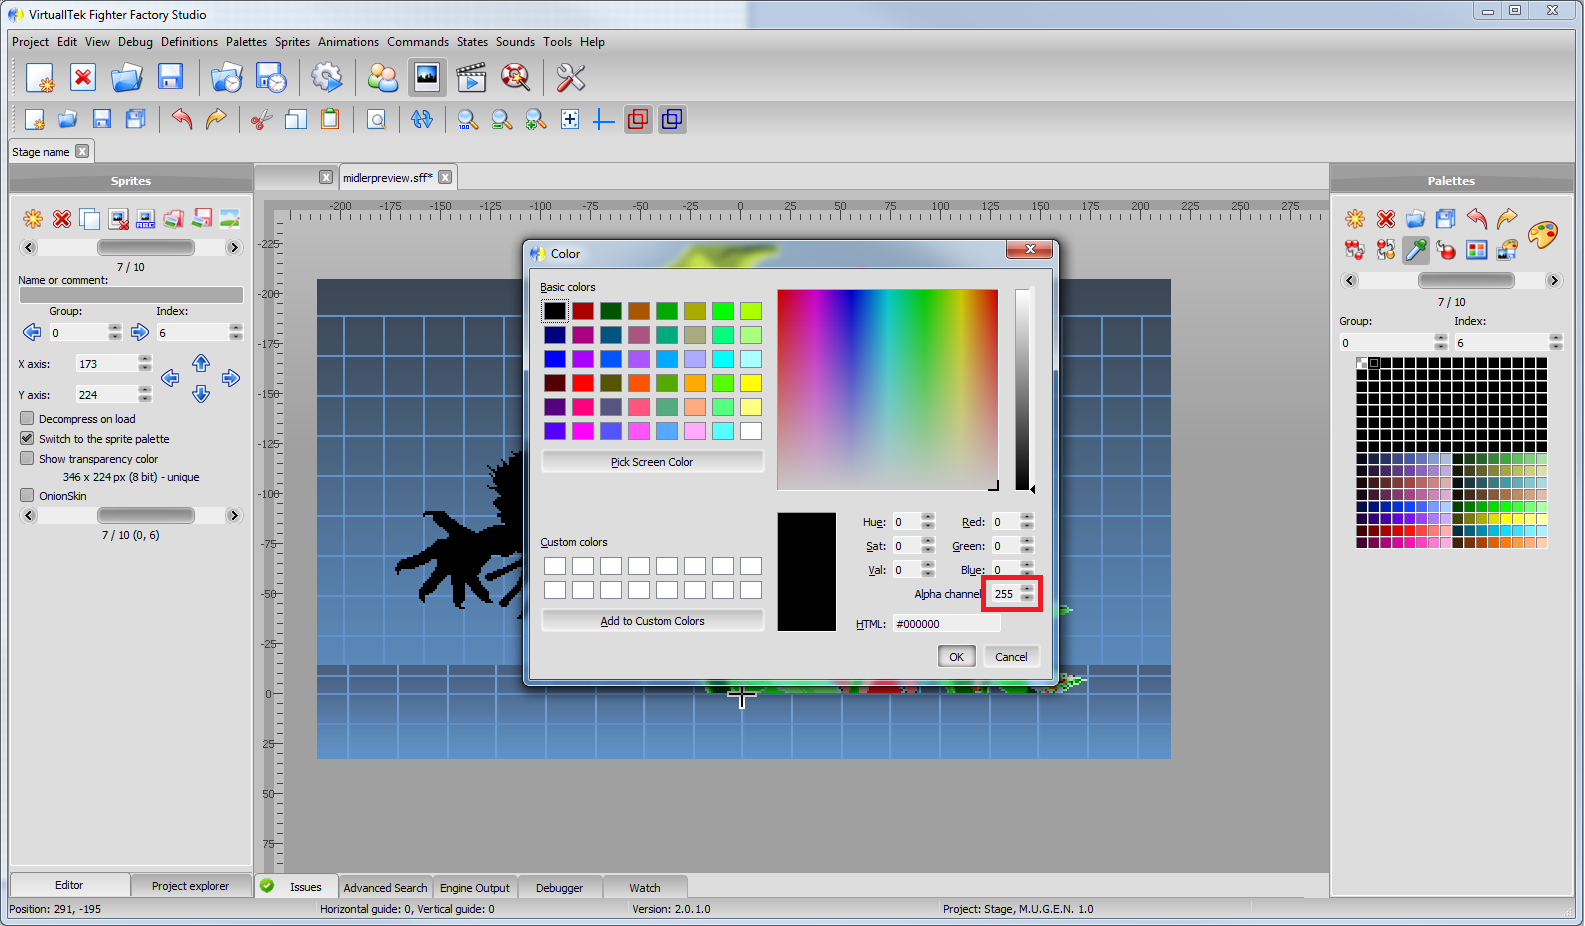
- Click OK: the other half of the Select/Winning image should be gone now.
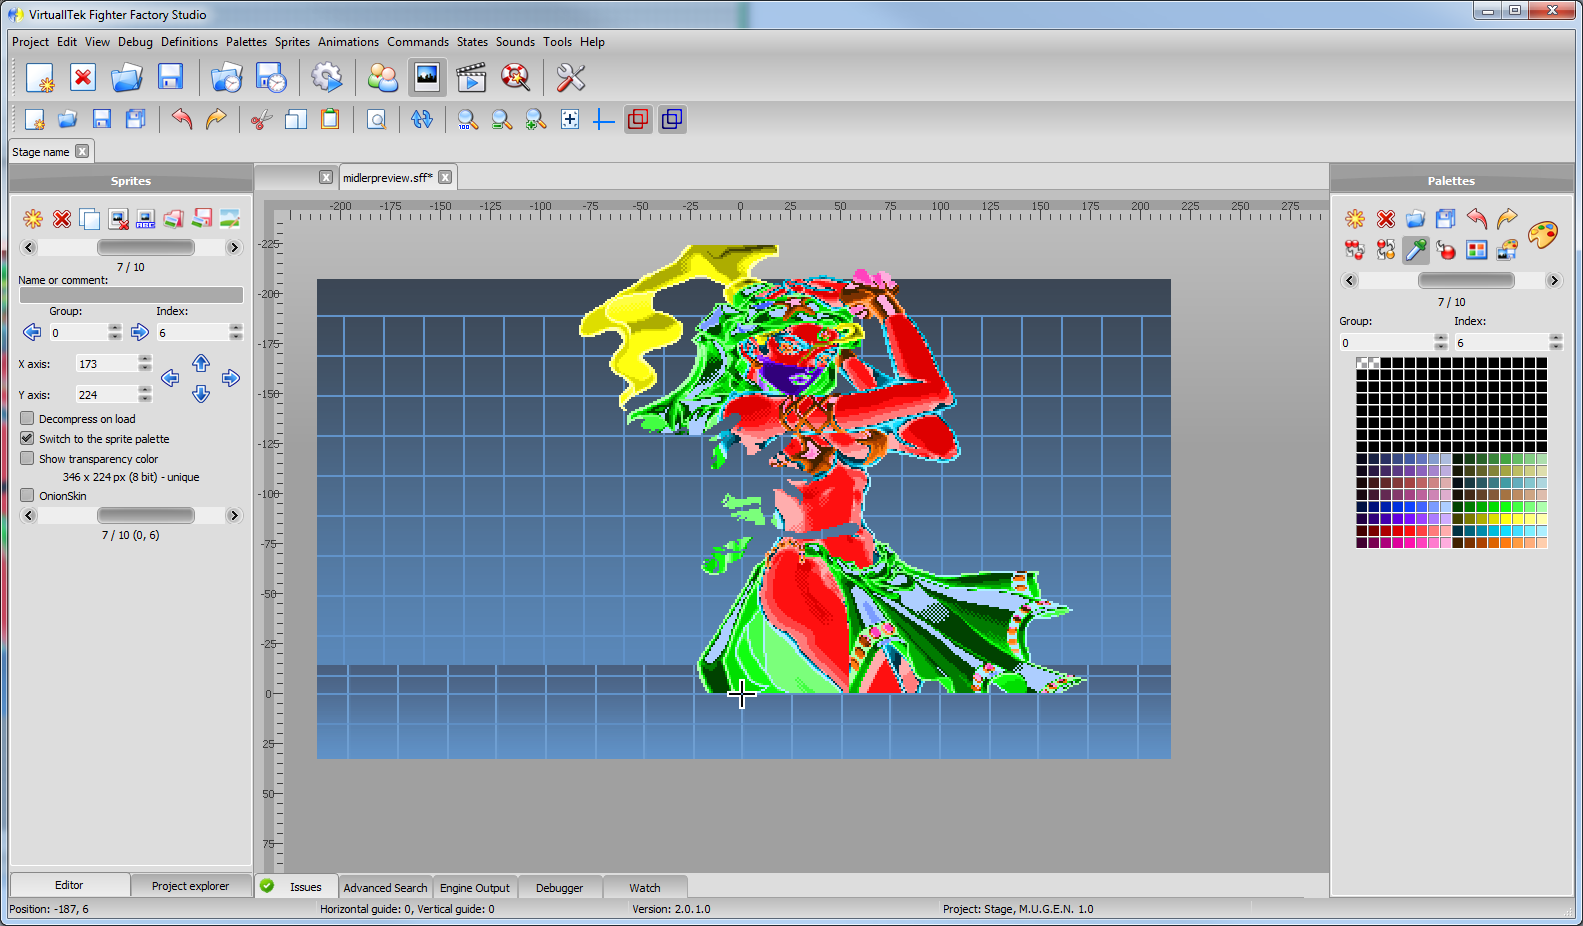
- Now go to the Sprites menu and choose "Save image as...". Use this to export the image as a PNG file.
- Optional: For SFFs that contain multiple sprites on the left in the "Sprites" tab it will show "1/5" (or something like that) with an option to move a slider to change sprites. You may want to repeat these steps for every sprite within the SFF if you want to use all the possible sprites in PalMod.
- You now have the SFF as a PNG aligned to a differentiated ACT: let's move on to converting that to a RAW.
- Open up Adobe Photoshop.
- Open up that PNG you just created into PhotoShop. It should already be using indexed colors. Isn't that so cool! Haha, not quite.
- Go to Photoshop's Image menu, select "Mode", and change from "Indexed Color..." to "RGB Color" because gdi Fighter Factory Studio uses upside-down palettes.
- Now we get to make the image use Indexed Color again... except this time with a right-side-up palette. Go back to Image : "Mode" and change back to "Indexed Color...". When the "Indexed Color" dialog pops up, select the "Palette:" listbox and change to "Custom...". On that dialog use "Load..." to load the ACT file you used previously. Click OK. Click OK.
- Optional: Crop out surrounding whitespace that doesn't need to be there. Make sure Anti-Alias is off and Tolerance is set to zero if you use the Magic Eraser.
- Go to the File menu and choose "Save As...".
- Change "Save as type:" to "Photoshop Raw (*.RAW)".
- RAW files are pure image data: they do not include any header information. As such, we need to use a special filename syntax to tell PalMod how to handle the file. We will want to include the Canvas "W" and "H" values in the filename itself.
- PalMod wants filenames of the form "(whatever)-W-WIDTH-H-HEIGHT.raw". An example of a possible filename would be "kobun-bullmover-W-200-H-120.raw". If you do not include this data in the filename, PalMod cannot load the file. If you specify the wrong width or height, PalMod will not load the file correctly.
- Click OK, click OK on the Raw Options and now you have a RAW file for use with PalMod.
- Open up PalMod.
- Go to File and choose the option (Load ROM or Load Directory) that lets you load the game you want to edit.
- Use the comboboxes on the right to find the character (or game element) of interest and then the particular palette of interest. For example, the "Kobun" character, the "LP" color, and the "(05) Bull Mover" palette.
- For many palettes, PalMod may already have a sprite preview available. For others, not yet, and maybe your efforts help with that. Either way, you can forcibly update the preview with the RAW you just made.
- To load the RAW file we created in Photoshop, just go to PalMod's Preview window. In the File menu select "Load Texture". Then load the RAW file you used earlier.
- If this all worked correctly, you should see the current palette used to colorize your RAW sprite.
- If everything checks out here, consider submitting the RAW to the PalMod team for integration so that others can benefit from your work.
|