Using Paxtez's Mod Manager
Select "Rebuild ARC File". When that's done, select "Copy to Steam". That's it - you're ready to play!
Using CollectionTool
Double-click CollectionTool.bat. Select "Marvel vs Capcom Collection", select "Marvel vs Capcom 2", select "Game", then select Repack. That's it, you're ready to play!
Using ARCTool
Run:
Troubleshooting
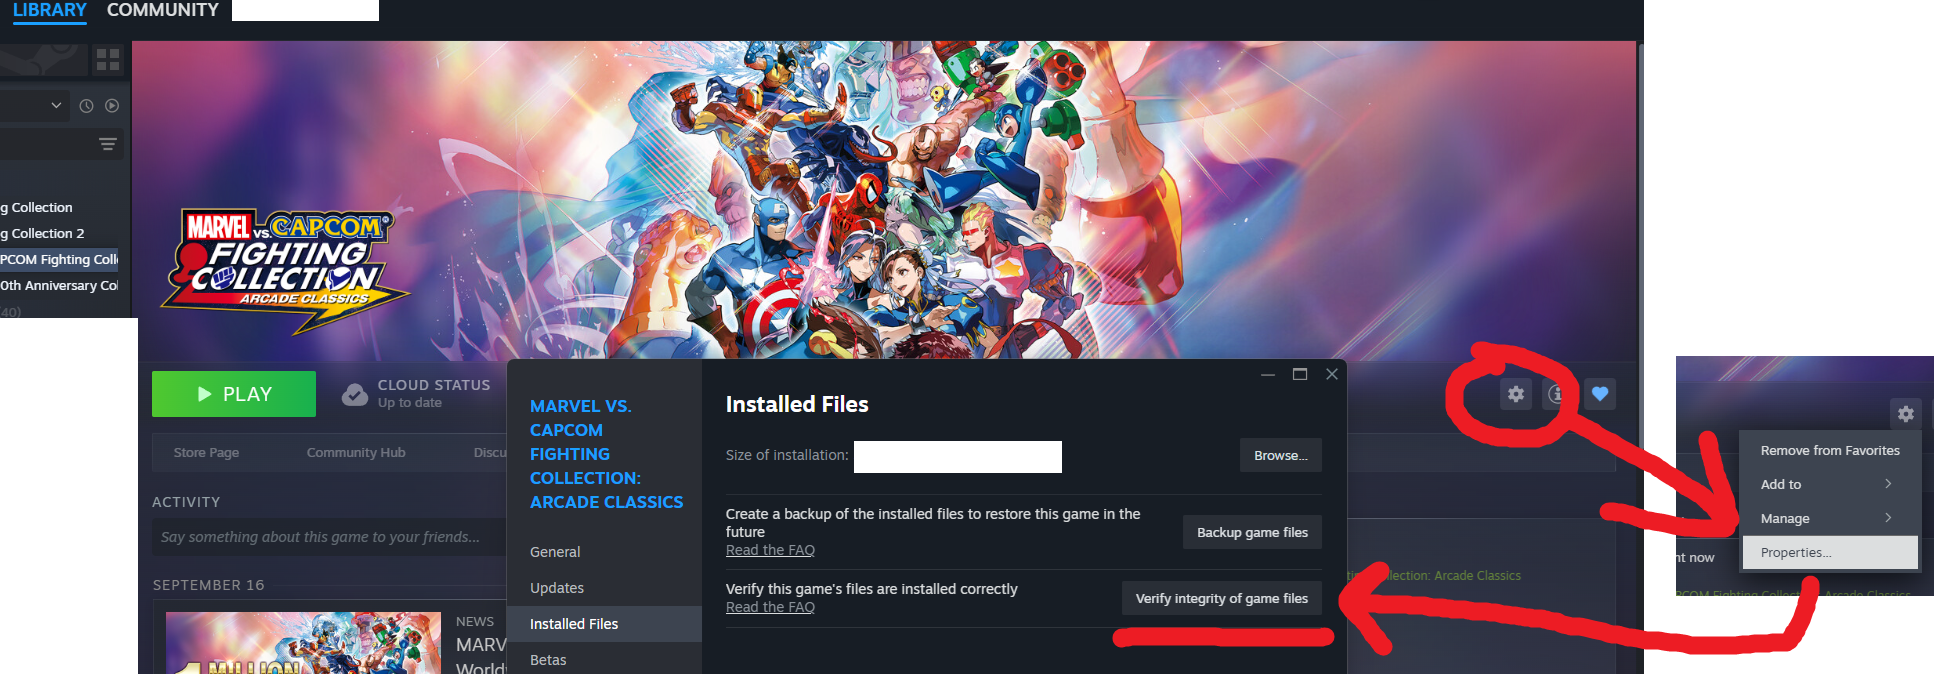
If you have any problems, you can always restore your ARCs from the backup copy you made earlier. Don't forget to save copies of your changes that you really like to: having checkpoint backups saves a lot of time and frustration.If you forgot to make a backup copy, you can repair your build using Steam. Go to Library : Home. Go to the Marvel vs Capcom Fighting Collection entry. On the same line where it says "Play", there is a gear near the right side. Click Manage : Properties... . Go to "Installed Files". Click "Verify integrity of game files": that will have Steam restore the original files.

