|
PalMod: Capturing sprites using WinKawaks
Howdy! I hope you're finding PalMod useful. This is a quick guide to generating indexed PNG files that can be used by PalMod for sprite display. PalMod has many sprites built in already, but you can pretty easily use WinKawaks to expand PalMod's coverage further. This guide is a little wordy but it's pretty quick once you do it once. This will work for CPS1 and CPS2 games. It will also work with the sprite layer for NeoGeo games, but the background layers may not work. The reason you might want to use WinKawaks is because its Shot Factory tool makes capturing foreground sprites very easy. If you want to capture background layers such as stage backgrounds, it is highly highly recommended you do NOT use WinKawaks as WinKawaks only shows you the clipped user viewport. MAME lets you see the entire background layer, so use that for stages and such.
There are THREE easy steps:
- Update that palette to use a mapping palette
- Take a (RGB PNG) screenshot of the sprite that uses that palette
- Use PalMod to convert that (RGB PNG) screenshot to an indexed PNG preview
Tools You Need For This
- WinKawaks
- Arcade emulator with a great screenshot tool.
- PalMod
- PalMod itself: a tool used to modify palettes in game ROMs or files. Be sure you are using version 1.79.3413 or newer: that has some functionality here that makes this much easier than it used to be. (If you're using older versions of PalMod or want to go Hard Mode, here's how we used to do it.)
- PalMod WinKawaks ACTs
- A set of ACTs for use with WinKawaks that provide color delineation, avoiding problems with repeated colors within the palette. You can also use the older PhotoShop ACTs, but the WinKawaks ACT pack is designed to save as much time for you as possible. Extract these out to a folder you can use them from.
×
![]()
How To
Get your game's ROM.
- Find the ROM set for the game that you want to use. ROM sets of interest might be msh.zip, mshvsf.zip, mvsc.zip, sfa3.zip, xmcota.zip, xmvsf.zip, and so forth. ROM sites can be questionable: looking for "winkawaks (ROM_NAME)" usually helps me find better results.
- Copy that ZIP file to the "roms\cps2" folder under the WinKawaks folder for Capcom games. Make a back-up copy of this ZIP somewhere, since we will be changing that ZIP during this process.
- For the purposes of this write-up, I will pretend that you chose Super Gem Fighter (sgemf.zip) which uses rom file "pcf.07". You can easily follow along with this guide if you do that, or you can do your own thing and just keep track of the different things you're doing.
Use PalMod to update the sprite of interest to use a differentiated palette.
- Extract the files in that ZIP out to somewhere.
- Open the ROM in PalMod by using PalMod's File :: "Load ROM by game" option. If you're using Super Gem Fighter, that is a CPS2 game, so we will look for and find that in the Capcom CPS1/2 submenu. When the open file dialog comes up, we point that to the extracted files and it will filter the view down to the ROM file (in this case "pcf.07") and we will select that.
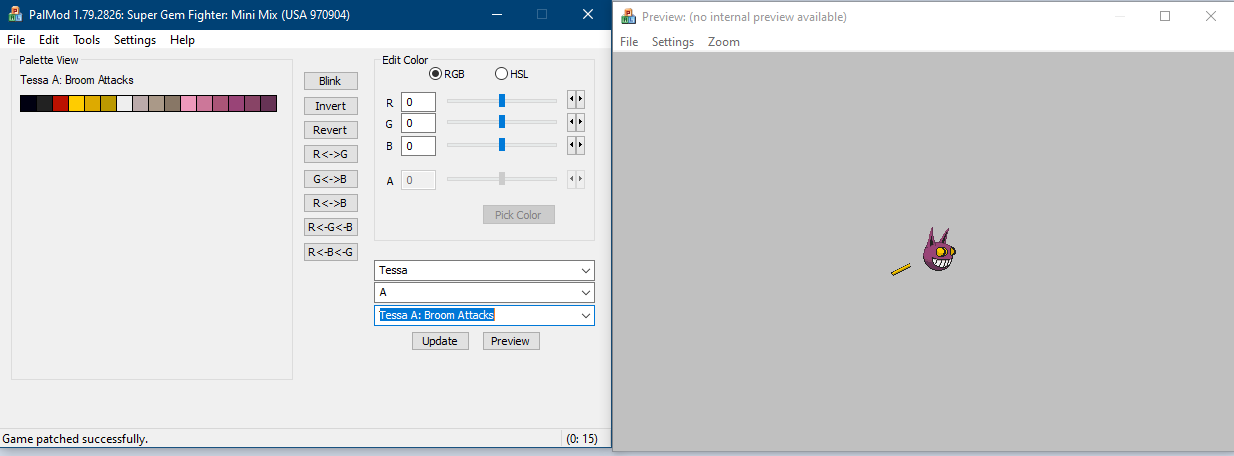
- Go to the palette for the character that you want to create a preview for. For our example we will choose Tessa. She does not have a preview for her Broom Attacks, so let's use that specific palette.
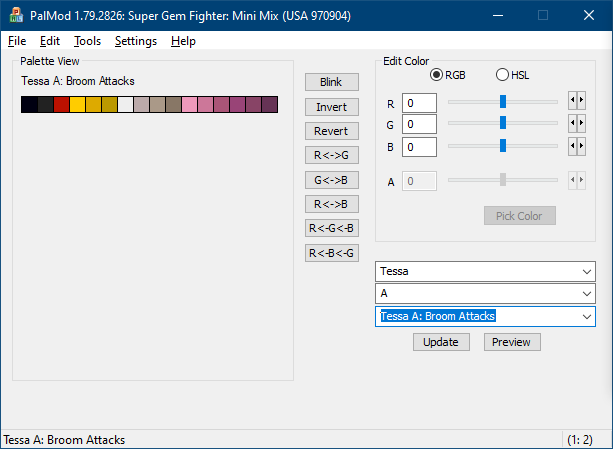
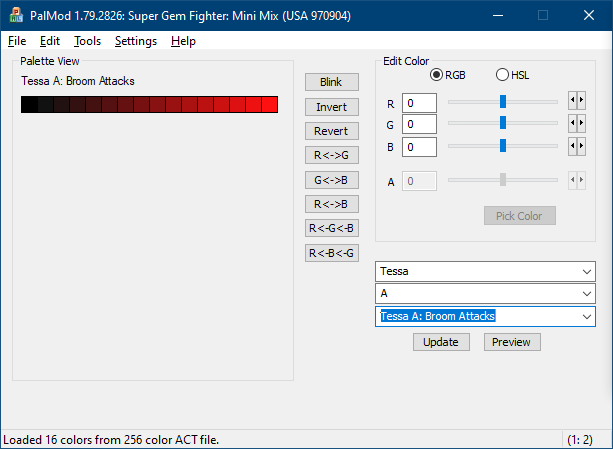
- Go to the Tools menu and select "Load Palette". Load one of the differentiated palettes from the KawaksACTs.zip. (Use ACT_Spectrum_0000.act: the pack contains multiple ACTs to make advanced projects such as paired palettes and stages easier.) This ensures that the sprite we capture later can be used effectively. Once you have loaded up the palette, the Palette View table should look pretty rainbowy. (You can also drag and drop an ACT onto PalMod: we know to use the palette you just gave us.)
- Now go the File menu and select Patch Changes. This updates your ROM.
- Don't exit PalMod! Keep it open and we're going do a little trick later.
- Now copy that changed ROM file (such as "pcf.07" for SGF) into the game ZIP file ("sgemf.zip" for SGF) in the WinKawaks folder.
- Every time you update that ZIP, you also must delete the MAME cache for that game so that it fully reloads your game ROM. The cache is stored under the "nvram" directory in the folder named for that ZIP. So for JojoBA, we want to delete the folder "nvram\jojobanr1" or we won't get our changes used.
Open WinKawaks.
- Go to the File menu and select "Load game".
- If your game doesn't show up, click the "Scan for new" button on the right. Select your game and click OK. Make sure "Show CPS2 games" is checked on the right.
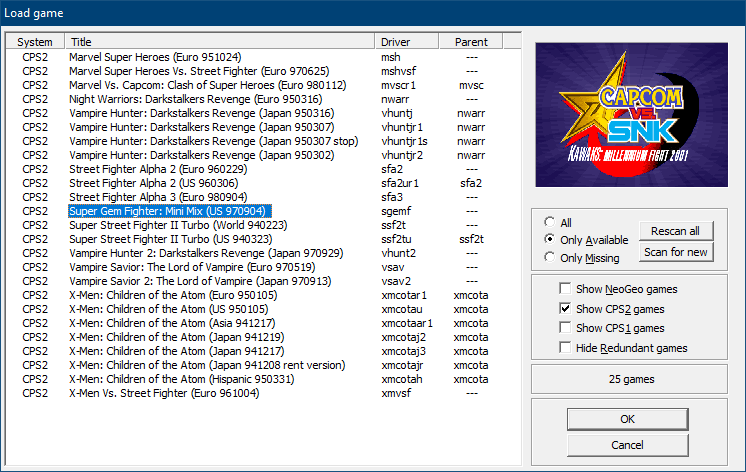
- Wait for the game to load.
- Go to Game : Cheats in WinKawaks. Set Enabled for Infinite Time, Infinite Energy PL1, and Infinite Energy PL2. That lets us have time to figure things out. (I also Enable the Always have Max Power PL1 and Infinite Super Stocks PL1 options, but you don't need to.)
- Press F4 to add credits. Press F1 to have you (player 1) join the game, and press F2 to have a dummy player 2 join the game.
- For Player 1 select Tessa color A (punch). It doesn't matter what Player 2 selects, just have them select something so we can get into the game.
- Once the sprite you care about shows up, press Return to pause. It turns out that Tessa both flies in on that Broom, and that her Punch attack uses a broom. So press Return as soon as you see the frame that you want. If you want to use pro tactics, press the button that causes the attack of interest and then immediately bring up Shot Factory (Control+F). Press "Step frame" there until you see the frame you want onscreen. Either way, bring up Shot Factory.
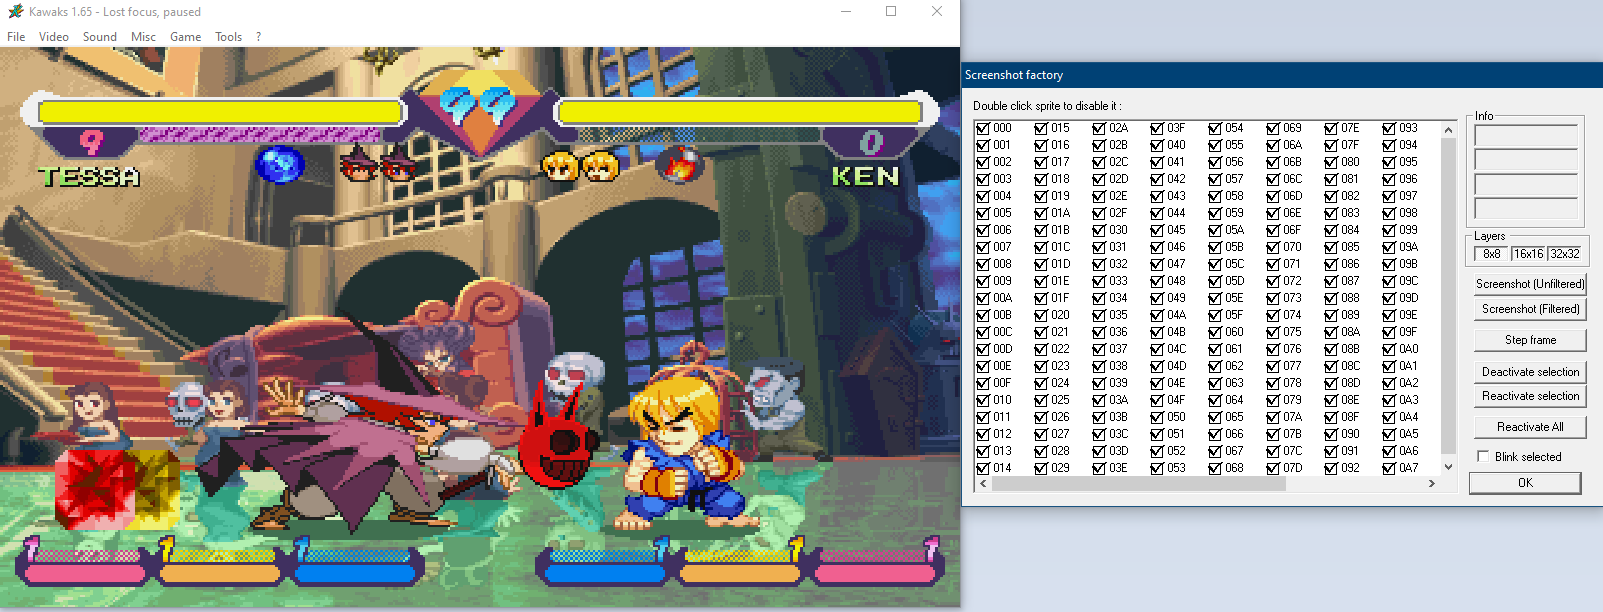
- In the Layers section on right right, click the "8x8", "16x16", and "32x32" buttons to turn those off.
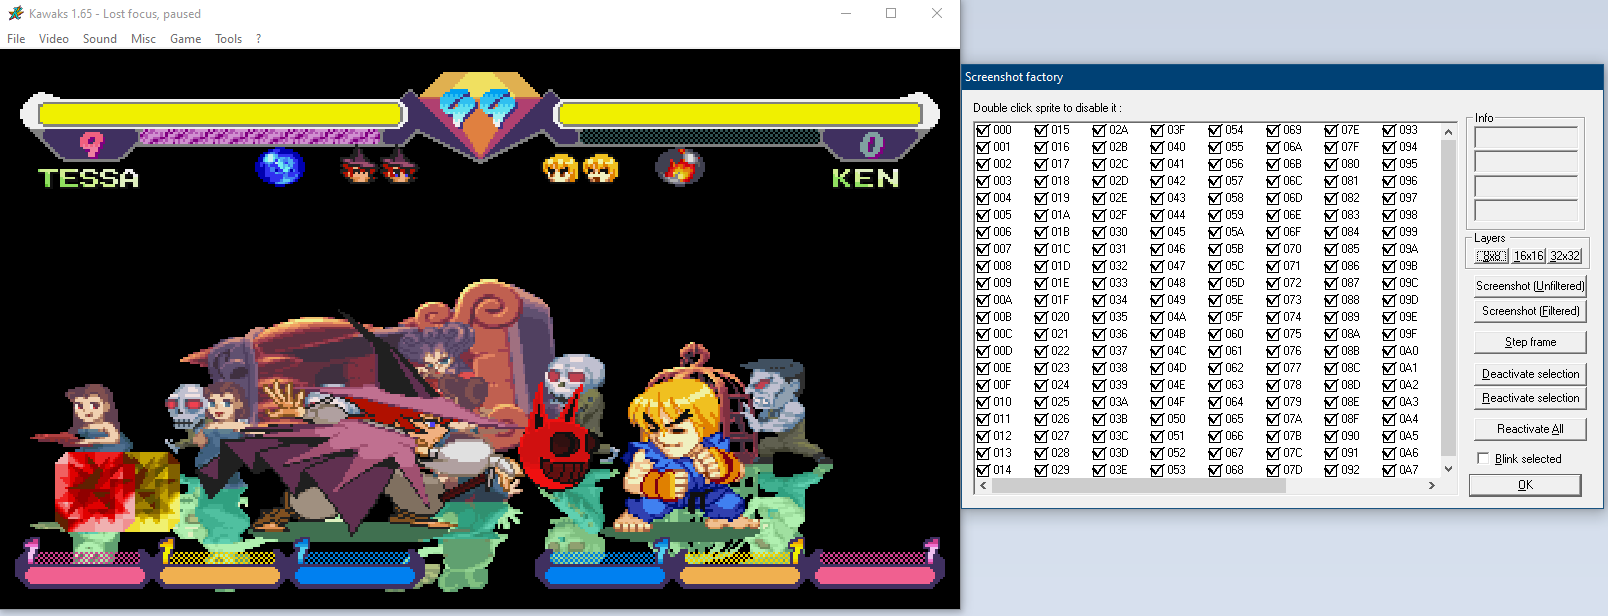
(Layers are usually just where the stage backgrounds are handled. For example if I capture stages often I turn off all foreground objects and then capture each layer 1 by 1 to get those objects.)
- Now the fun part! We need to turn off every sprite tile except for the ones representing the sprite we care about.
- Click "Blink selected" to make things easy. This will make it so that when you select a sprite it flashes and makes it easy to figure out if you want it shown or not. You can use your mouse to select a large number of sprites at once. If they're not part of your sprite, click "Deactivate selection" to make them go away. Keep grinding away turning off other sprite elements until you have just your sprite.
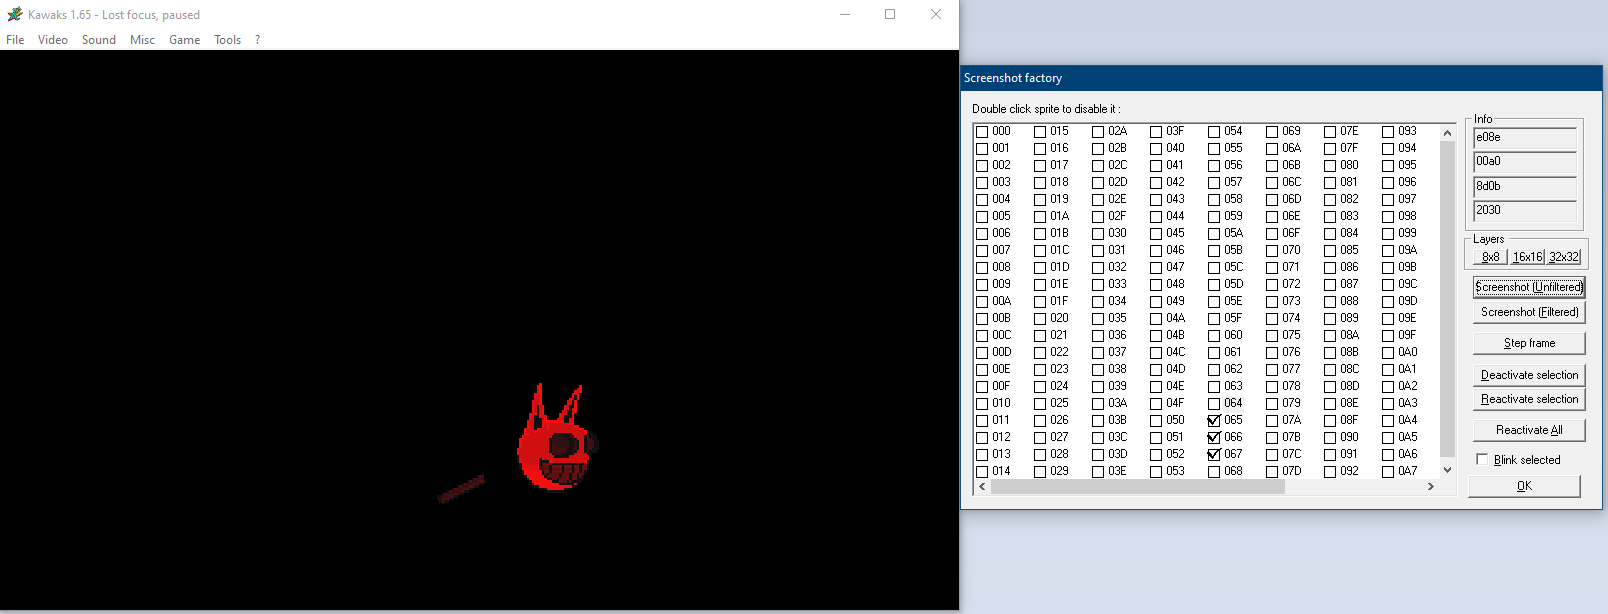
- Click "Screenshot (Unfiltered)" to have WinKawaks save out the image you're looking at. That file will be saved to the "capture" folder under the WinKawaks directory. (You can capture more frames of that move if you want, but for our example we're just starting with one. Note that as you advance the game the objects move around, so you will want to reactive the disabled selections to figure out where your sprite moved to so you can isolate it again.)
- Once you're done, turn back on all 3 layers, click "Reactivate All" and then click "OK" so that the game looks reasonable again.
- We're done with WinKawaks, so you can exit it if you want.
Bring back up PalMod!
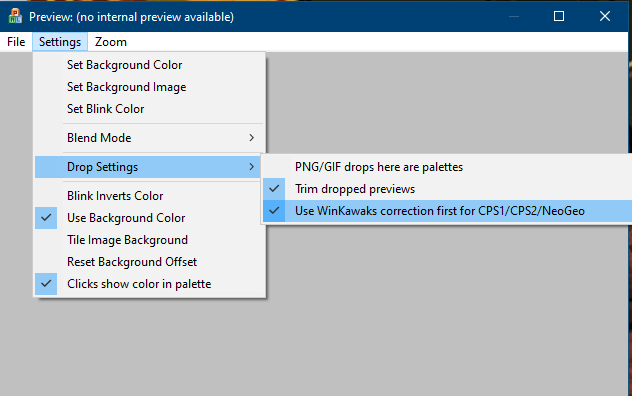
- Go to PalMod's sad empty Preview window. Feel sad for it. Go to Settings : Drop Settings and turn off "PNG/GIF drops here are palettes" and turn on "Use WinKawaks correction first for CPS1/CPS2/NeoGeo". (You don't technically have to turn this option on, but it makes your life easier since WinKawaks use buggy math. We will fall back to using the WinKawaks color logic if we find absolutely zero matches, but you can save time and get better results if you just start with it on when you know you're using WinKawaks.)
- Drag and drop "sgemf000.png" (or whatever screenshot you took that shows the isolated sprite) fomr the WinKawaks "capture" subfolder onto the Preview window of PalMod. (Or you can use PalMod's Preview : File : Load Texture option, whatever is easier.)
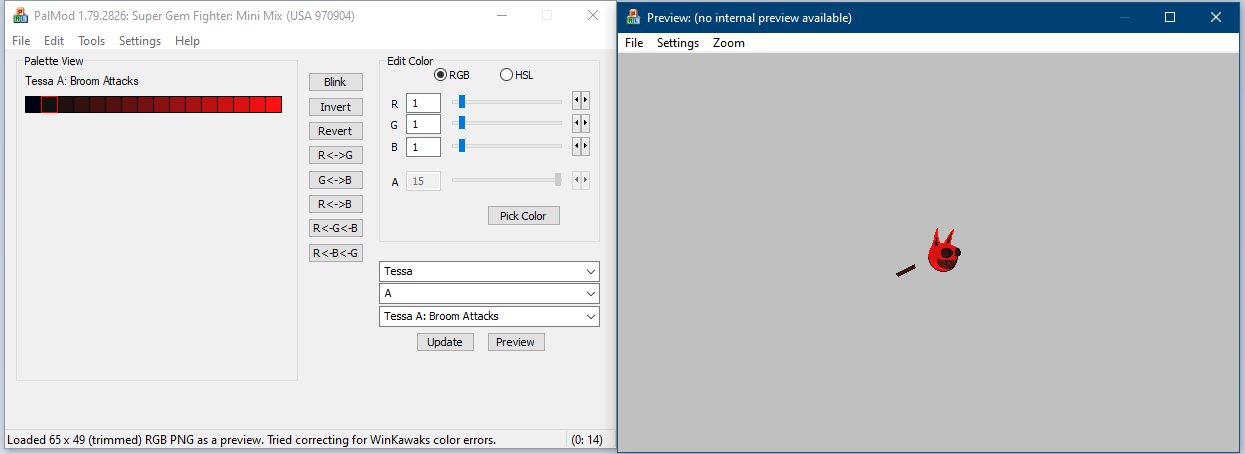
- If you kept PalMod open like I told you to, press CTRL+Z (or Edit : Undo) to undo applying that Spectrum palette and you'll see the original palette used in your preview.
- Either way, now to go to Preview :: File :: Export Image and export this image as an Indexed PNG (the first option).
- (If you didn't keep PalMod open and are still using the mapping palette, you can open up your backup copy of the ROM, go to Tessa : A : Broom Attacks, drag and drop your new Indexed PNG onto the Preview window. It'll show up with the normal colors here, and you can save it back out as an indexed PNG so that your saved Indexed PNG shows you exactly what you would expect in game.)
You now have a preview for that sprite that will work for everybody!

(If you're using Firefox, you can just drag and drop that onto PalMod's Preview window with Tessa : A: Tessa A: Broom Attacks up and it'll get used as a preview. If you're using other browsers, you can save it locally and then use it as a preview from there.)
Woot! If everything checks out here, consider submitting that indexed PNG to the PalMod team for integration so that others can benefit from your work.
Advanced Tactics and Tips
- Don't use white (ffffff) or black (000000) in your mapping palette. Those are often default colors for tools, so avoiding using those saves us time and confusion. The WinKawaks ACTs I supplied should work great for what you're trying to do.
- You can take all the beautiful screenshots in WinKawaks that you want and then combine those together in your favorite imaging editor. Once you're done, just drop that onto PalMod and we'll isolate out and index the sprites.
- This works for layered palettes such as stages or Wolverine with his bone claws. That's why there's 14 mapping palettes. Just drop everything else out of the view in WinKawaks, take that screenshot, and let PalMod figure it out.
- PalMod only indexes the RGB PNG at the time you drag and drop it, so if you change which palette you're looking at you should drag and drop that RGB PNG back onto PalMod so that we rescan it for the current color matches.
- Once you have a mapping palette and generate a preview that works with that, you can use Palmod's File : Export Image and select another button color if they exist (such as Kick) for that character to see how it looks like with "real" colors if you don't have the real colors immediately handy.
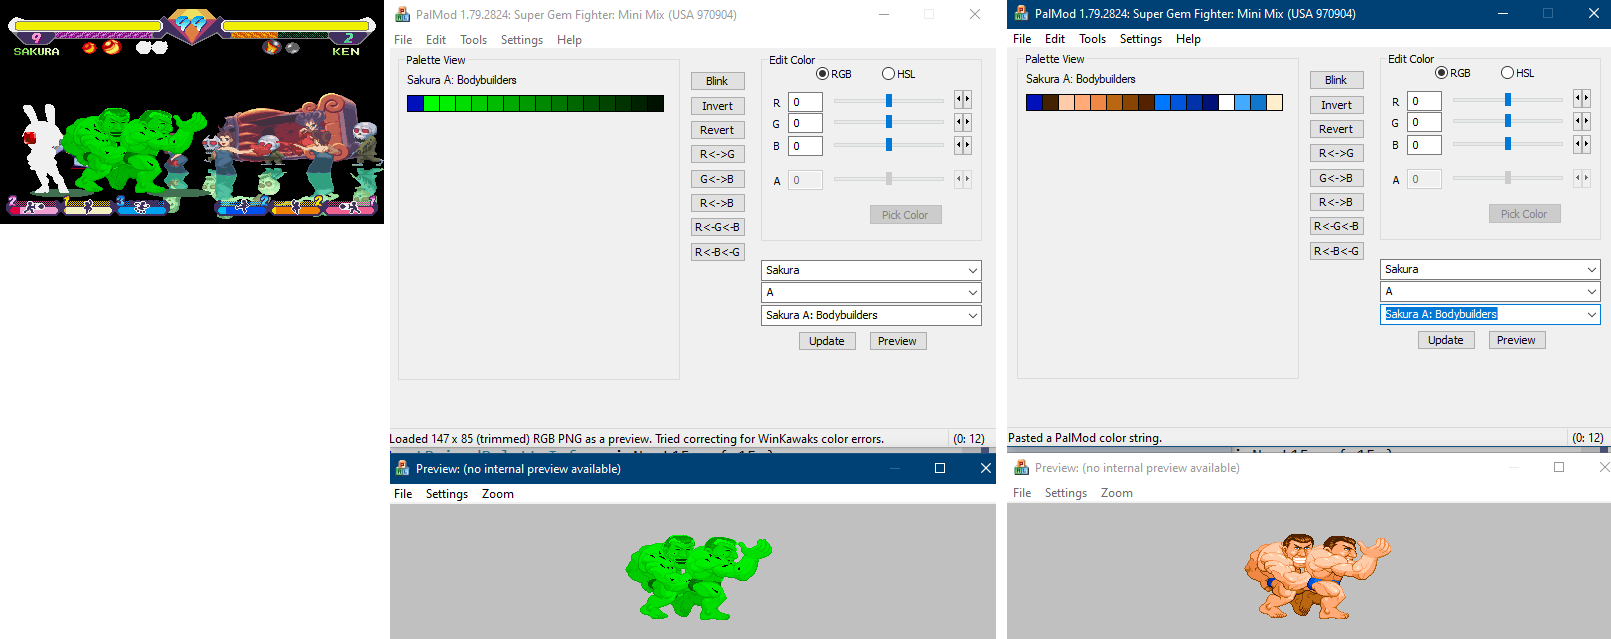
- You can stash extra data in your RGB PNG. If it references palettes 1 and 2 and those palettes don't contain any same colors, it'll load just palette 1 for palette 1, and just palette 2 for palette 2. Then you can export it back out (as indexed or RGB) and you'll get just the palette set that you wanted. Here's an example of PalMod just filtering out colors of the active palette:
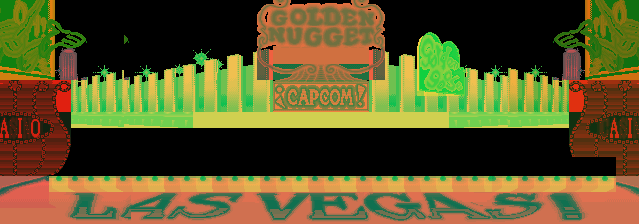
- This works great for stages too. When I was working with Balrog stages for ST, I was using 12 mapping palettes at one time, and then let PalMod delayer the screenshot back for into a layer for each of the 12 palettes.
|