|
PalMod: Capturing sprites using WinKawaks
Howdy! I hope you're finding PalMod useful. This is a quick guide to generating RAW texture files that can be used by PalMod for sprite display. PalMod has many sprites built in already, but you can pretty easily use WinKawaks to expand PalMod's coverage further.
Tools You Need For This
- WinKawaks
- Arcade emulator with a great screenshot tool.
- Adobe Photoshop
- Crazy good image editing studio, with a free 7 day trial available.
- PalMod
- PalMod itself: a tool used to modify palettes in game ROMs or files.
- PalMod Photoshop ACTs
- A set of ACTs for use with PhotoShop that provide maximum possible color delineation, avoiding problems with repeated colors within the palette.
×
![]()
How To
Get your game's ROM.
- Find the ROM set for the game that you want to use. ROM sets of interest might be msh.zip, mshvsf.zip, mvsc.zip, sfa3.zip, xmcota.zip, xmvsf.zip, and so forth. ROM sites can be questionable: looking for "winkawaks (ROM_NAME)" usually helps me find better results.
- Copy that ZIP file to the "roms\cps2" folder under the WinKawaks folder for Capcom games, or under the "roms\neogeo" for SNK games. Make a back-up copy of this ZIP somewhere, since we will be changing that ZIP during this process.
Use PalMod to update the sprite of interest to use a differentiated palette.
- Extract the files in that ZIP out to somewhere.
- Open the ROM in PalMod by using PalMod's File::Load ROM option. You will need to change the "current ROM filter" shown in the bottom-right of this dialog so that your ROM files show up. By default, PalMod looks for the COTA ROM: change that to the game you want.
- Go to the palette for the character that you want to create a preview for.
- Go to the Tools menu and select "Load Palette". Load one of the differentiated palettes from the PhotoshopACTs.rar. This ensures that the sprite we capture later can be used effectively. Once you have loaded up the palette, the Palette View table should look pretty rainbowy.
- Now go the File menu and select Patch Changes. This updates your ROM.
- Now copy that changed ROM file (such as "msh.05" for MSH) into the game ZIP file in the WinKawaks folder.
Open WinKawaks.
- Go to the File menu and select "Load game".
- If your game doesn't show up, click the "Scan for new" button on the right. Select your game and click OK.
- Wait for the game to load. Probably you need to press F4 to add credits, and then F1 to start the game. Otherwise, get to the point where your changed sprite shows up on screen. If your changed sprite is only shown in special situations, you can use Tools : Shot Factory's "Step frame" option to advance the game one frame at a time. It's slow but works.
- Once the sprite you care about shows up, press Return to pause.
- Go the Video menu and use "Set background color..." to change the WinKawak's background color to a color not shown in the sprite you want. The pictures here use black, but Cyan and Pink can be great non-conflicting choices.
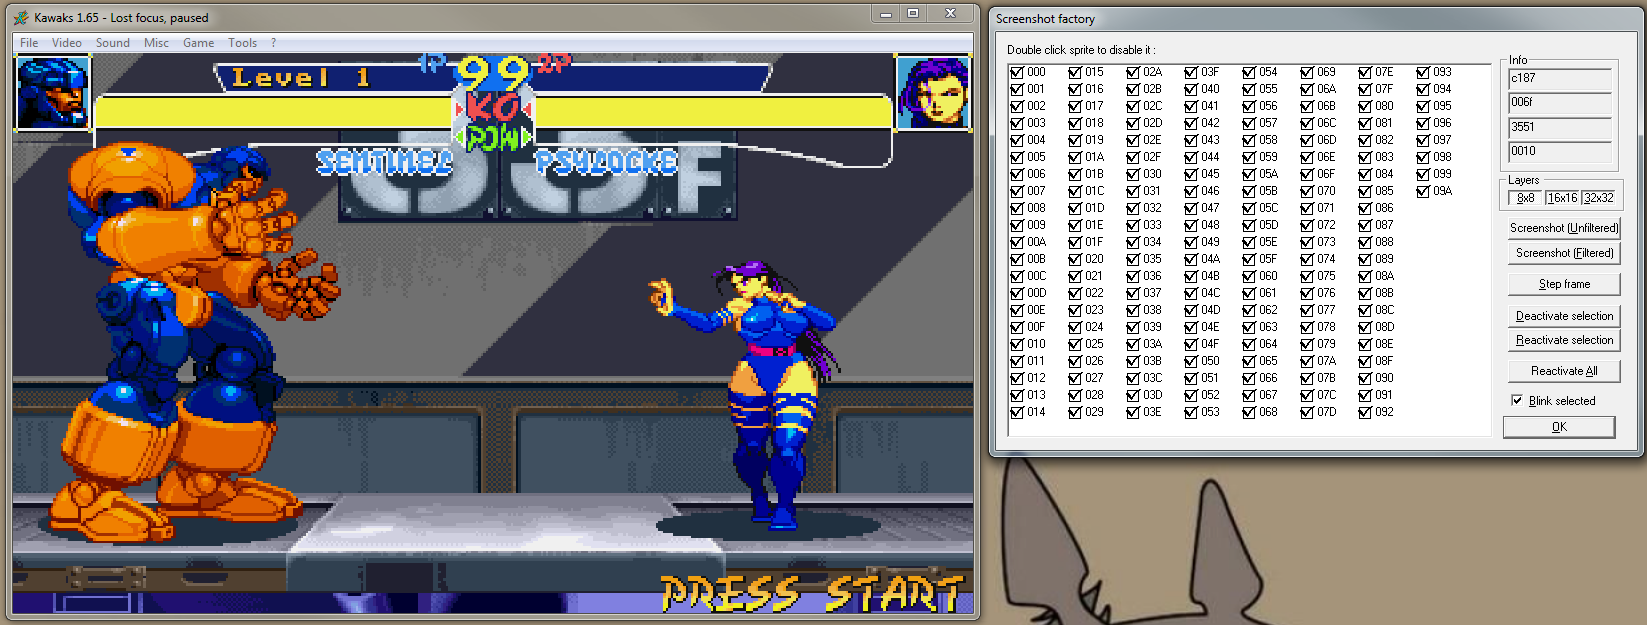
- Go to the Tools menu and select "Shot Factory". You should see this:
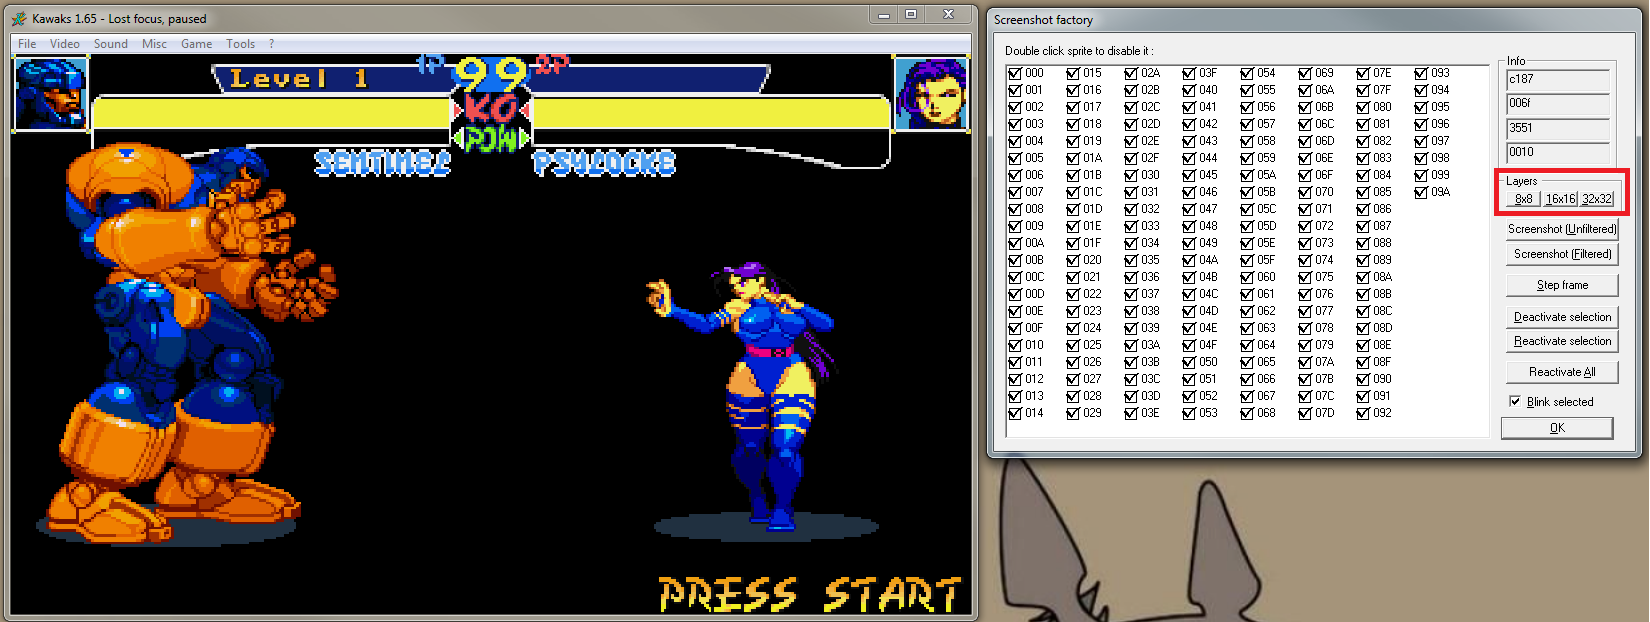
- In the Layers section on right right, click the "8x8", "16x16", and "32x32" buttons to turn those off.
- Now the fun part! We need to turn off every sprite tile except for the ones representing the sprite we care about.
- Click "Blink selected" to make things easy. This will make it so that when you select a sprite it flashes and makes it easy to figure out if you want it shown or not. You can use your mouse to select a large number of sprites at once. If they're not part of your sprite, click "Deactivate selection" to make them go away. Keep grinding away turning off other sprite elements until you have just your sprite.
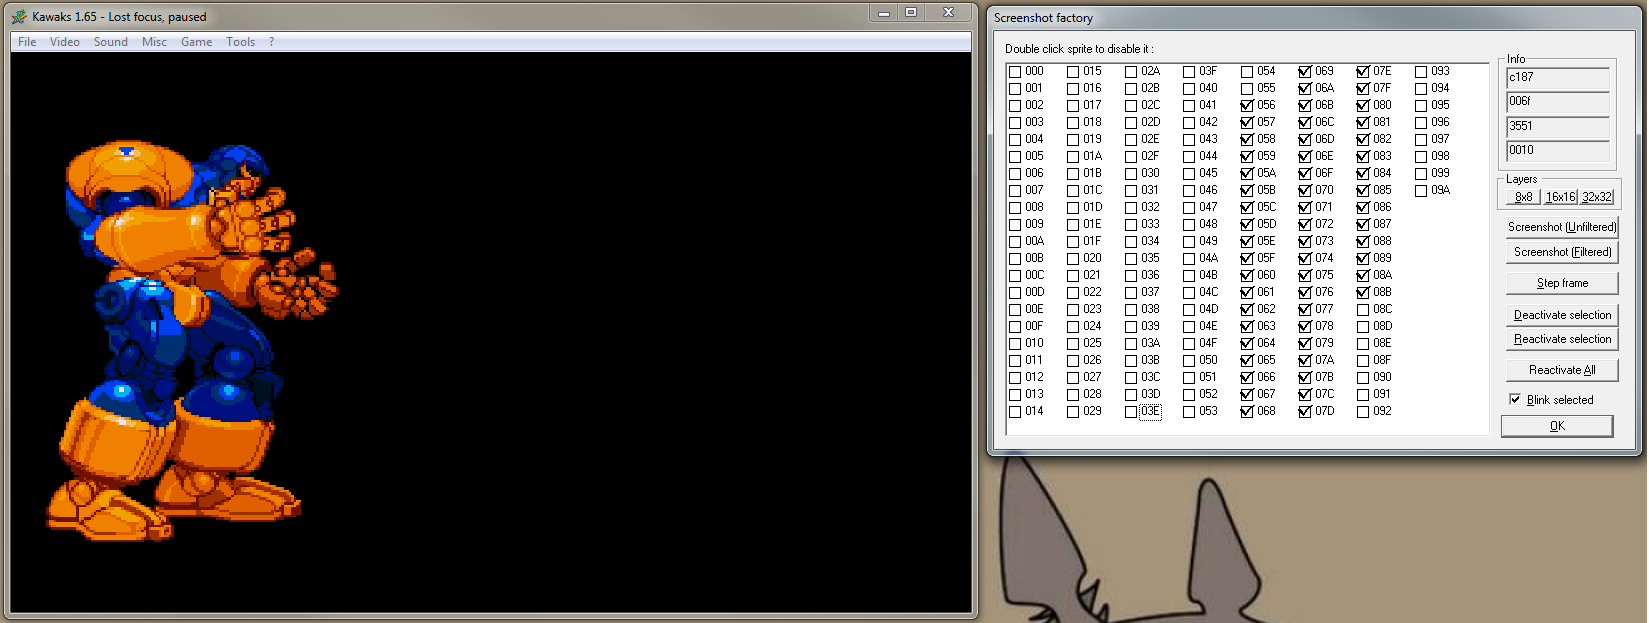
- Click "Screenshot (Unfiltered)" to have WinKawaks save out the image you're looking at. That file will be saved to the "capture" folder under the WinKawaks directory.
- Once you're done, turn back on the layers, click "Reactivate All" and then click "OK" so that the game looks reasonable again.
Open up Adobe Photoshop.
- Open up that PNG you just created in PhotoShop.
- Press CTRL+0 (View : Fit on Screen) so that you can see everything clearly.
- The first thing we want to do is eliminate the background.
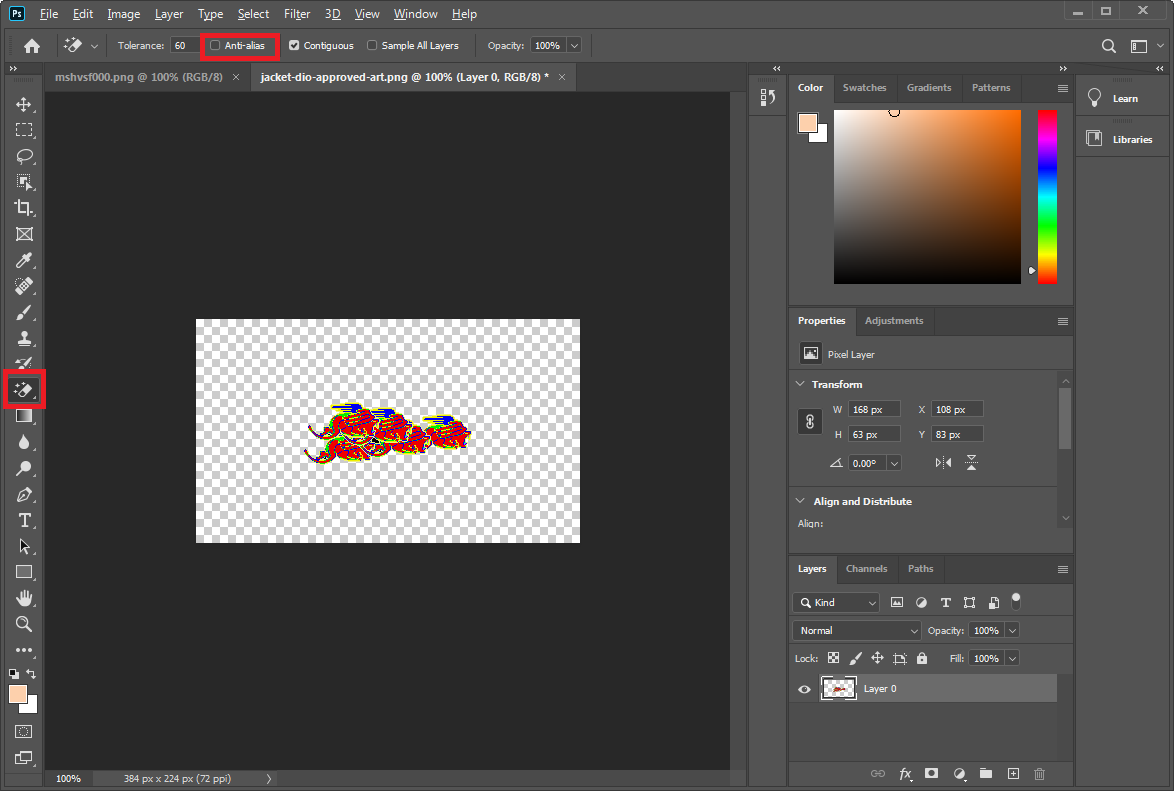
- Select the Magic Eraser tool on the left.
- Make sure to uncheck Anti-alias: we actually want clean edges.
- Make sure to change "Tolerance": we really do actually want clean edges!
- Click the background to make it go away. There may be background elements nested within the sprite: you might need to click those individual regions or even pixels individually to clear them.
- Now we want to crop down to just the sprite we care about.
- The second tool on the left ribbon is the Rectangular Marquee tool. Select that. Then select a rectangle in your PNG that just contains the sprite you care about. Press CTRL+C to Copy that sprite.
- Press CTRL+N to have Photoshop create a new image. By default Photoshop will use your clipboard sizing: we want that. Click Create.
- Press CTRL+0 (View : Fit on Screen) so that you can see everything clearly.
- Erase the white background on this new image by using the Magic Eraser again.
- Press CTRL+V to paste the sprite. It should fit perfectly.
- Go to Image : "Mode" and change the image to use "Indexed Color...". When the "Indexed Color" dialog pops up, select the "Palette:" listbox and change to "Custom...". On that dialog use "Load..." to load the ACT file you used previously. Click OK. Click OK.
Go to the Image menu, select "Image Rotation" and then select "Flip Canvas Vertical". (PalMod uses upside-down images for historical reasons.) You do not need to and should not do this any longer as of PalMod 1.73: just skip this step! :)
- Go to the File menu and choose "Save As...".
- Change "Save as type:" to "Photoshop Raw (*.RAW)".
- RAW files are pure image data: they do not include any header information. As such, we need to use a special filename syntax to tell PalMod how to handle the file. We will want to include the Canvas "W" and "H" values in the filename itself.
- PalMod wants filenames of the form "(whatever)-W-WIDTH-H-HEIGHT.raw". An example of a possible filename would be "kobun-bullmover-W-200-H-120.raw". If you do not include this data in the filename, PalMod cannot load the file. If you specify the wrong width or height, PalMod will display garbage.
- Click OK, click OK on the Raw Options and now you have a RAW file for use with PalMod.
Open up PalMod.
- Go to File and choose the option (Load ROM or Load Directory) that lets you load the game you want to edit.
- Use the comboboxes on the right to find the character (or game element) of interest and then the particular palette of interest. For example, the "Kobun" character, the "LP" color, and the "(05) Bull Mover" palette.
- For many palettes, PalMod may already have a sprite preview available. For others, not yet, and maybe your efforts help with that. Either way, you can forcibly update the preview with the RAW you just made.
- To load the RAW file we created in Photoshop, just go to PalMod's Preview window. In the File menu select "Load Texture". Then load the RAW file you used earlier.
- If this all worked correctly, you should see the current palette used to colorize your RAW sprite.
If everything checks out here, consider submitting the RAW to the PalMod team for integration so that others can benefit from your work.
|